


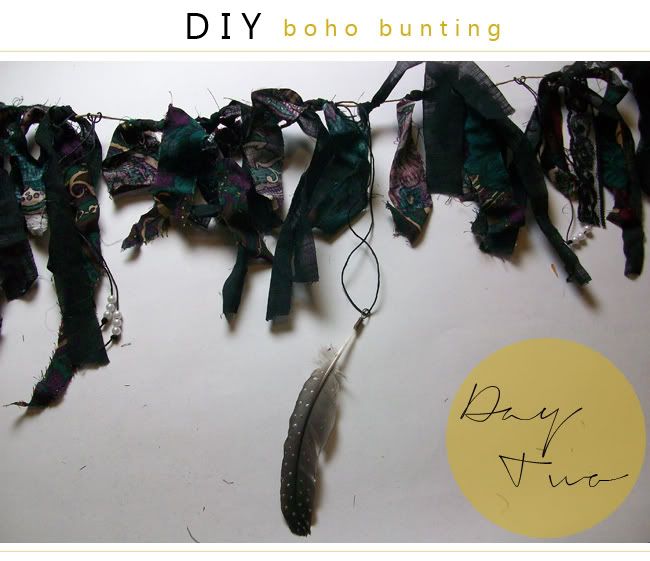
Happy Earth Day & Happy Vernal Equinox! It's a joy to have you here at Day Two of the DIY Week! I'm pleased as pie to bring you this super simple Boho Bunting project. It's so easy, but makes a big impact visually. I made this project out of scraps I had in my studio, and it actually turned out great! I hope you enjoy this tutorial and feel inspired to use some of your scraps/leftover materials and make your own! Have a beautiful Earth Day!

-Fabric. While searching through my fabric scraps, I started to separate the scraps based on which ones I thought went together well. I'm smitten for dark shades of floral patterns and jet black. I ended up with a big pile of these scraps and decided to make the bunting from these. But I've also made similar buntings with random, mis-matched fabric scraps and they always turn out great.
-String/Twine. A long piece to hang the bunting on.
-More String. To attach the decorative elements.
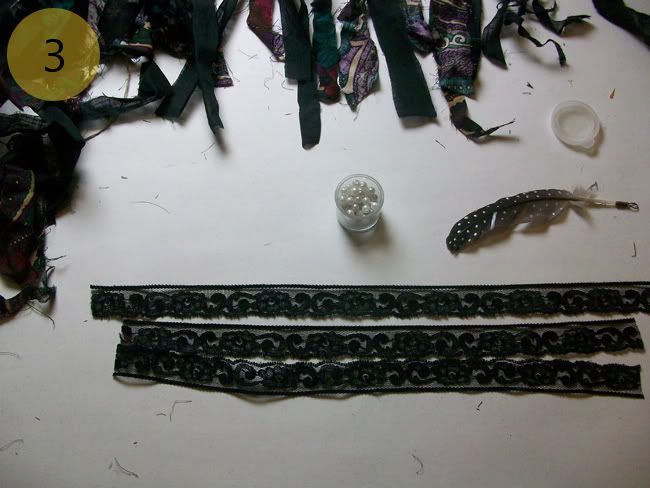
-Decorative Elements. I used some old pearl beads, a painted feather I never used, and some lace that wasn't long enough to use for clothing projects. I'm thinking that later I may add some Instagram photos that I print, more feathers, or even some wire-wrapped shells.
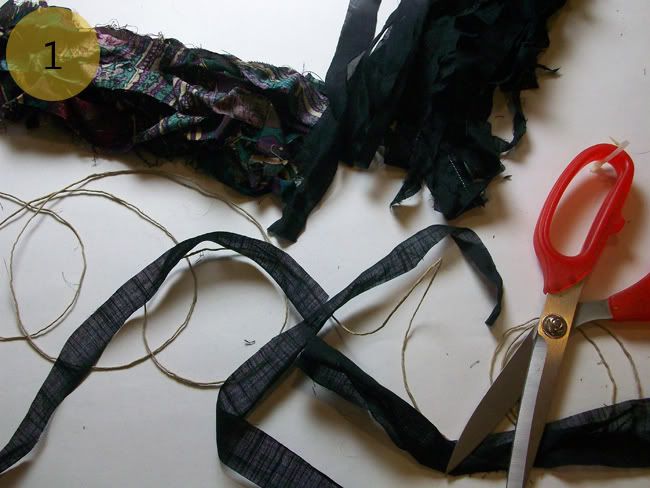
The first step is cut the leftover chunks of fabric into strips. While sewing, I often accumulate plenty of strips of fabric, and those can stay the way they are. The misshaped strips make it more unique and eye-catching. I would cut more strips than you think you need. This bunting looks prettier when it's filled up.
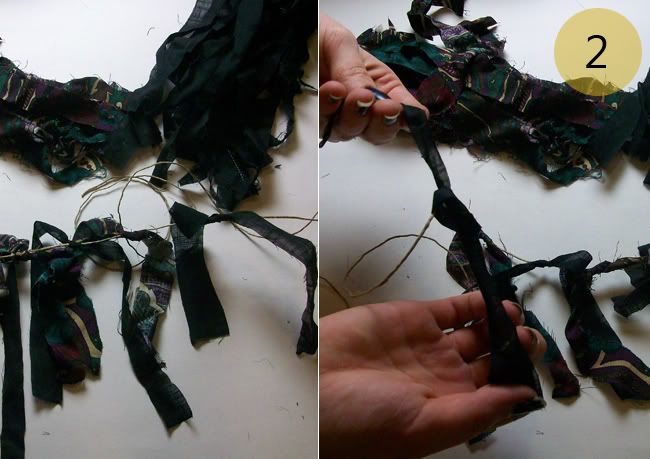
The next step is to take the twine you're using to hang the bunting and tie the strips to it. It's nothing fancy. Just a simple knot and move to the next one. (I can't recall exactly where I saw this being done for the first time, but I loved it and have repeated the technique numerous times since.)
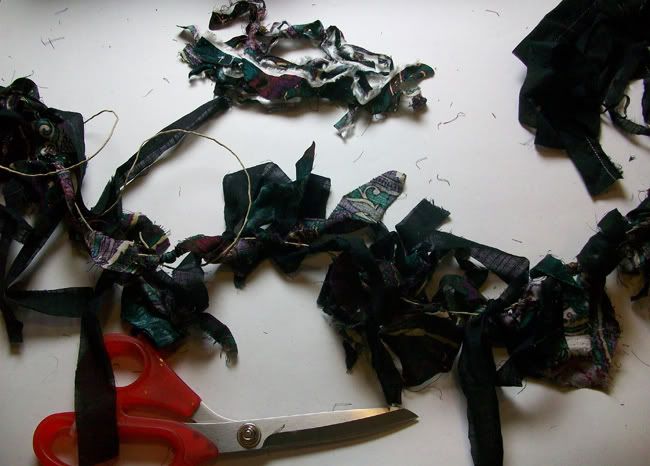
Keep tying, keep tying, keep tying... It helps to have something to watch or listen to. This part takes a while.
You could just stop here, hang it up, and it's done. But I wanted this project to incorporate more of my un-used materials from 2011. And I wanted it to have more sentimental value.
Gather up your decorative elements and think about where you want to add them in the bunting.
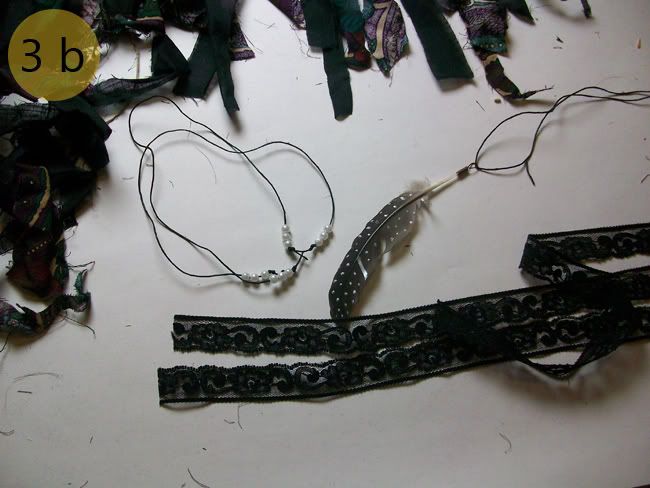
I tied the pieces of lace on the bunting in the same way I did for the fabric strips. Then I made a few strings of pearls, and put the feather on a string as well.
Add all of your decorations onto the bunting in various places.

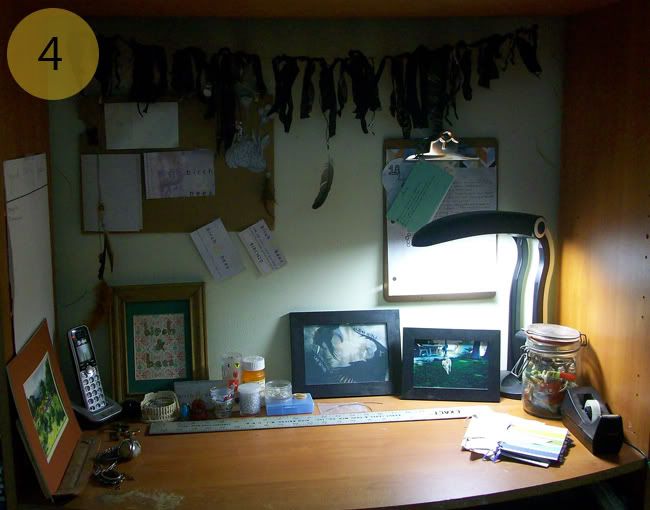
Finally, hang up your new bunting somewhere pretty and enjoy it! I decided to hang mine in my workspace to spice things up a little bit. Plus the lace, feathers, black, and floral print are some of my most favorite things.
This project took me about 20 minutes to complete, including taking photos along the way. I'm really enjoying using up my leftover materials in unique ways.
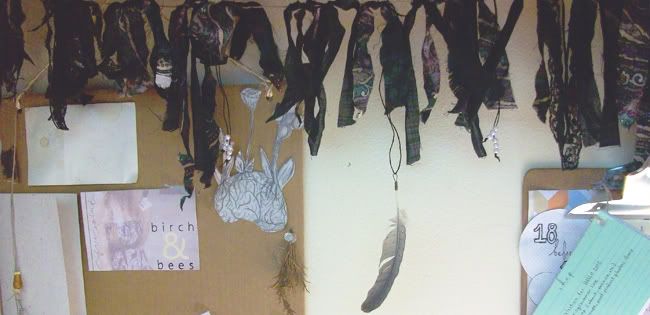
I've seen so may awesome buntings, garlands, and decorations that it almost feels like an obsession at this point. I love having big and little buntings all over my home. It makes every day feel like a party! (I guess today, it really is a party!)
If you have any questions or comments about this tutorial, feel free to comment here, message me on facebook, or shoot me an e-mail. If you make your own Boho Bunting, please share some photos with me!
Happy Earth Day & Happy Vernal Equinox! Have a superb day!
peace & love,
kaylee
I've been wanting to try some bunting projects... I'm so jealous of all the pictures I see ALL OVER the internet. This is so different from what I've seen. I love the feathers!
ReplyDelete