3.28.2012

Packaging On A Budget


Last week I shared my latest packaging update for the shop, (which I'm really pleased with). And, as promised, I'm sharing some advice on making packages and promotional materials on a tight budget. I really enjoy each time I get to wrap up something I've made and send it to someone. But when you're on a tight budget, then you have to be more creative and crafty. I'm still refining my process and trying new things. But, I've learned many things about developing lovely packages and marketing materials on a budget.


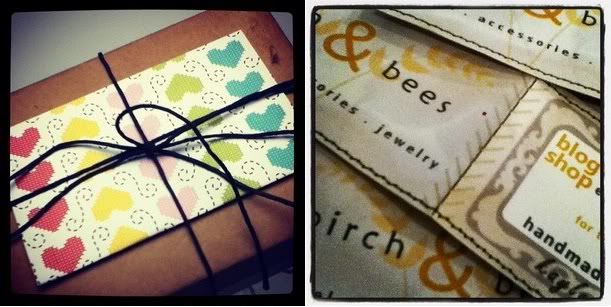
(A simply wrapped package, My handmade business cards with sewn edges)

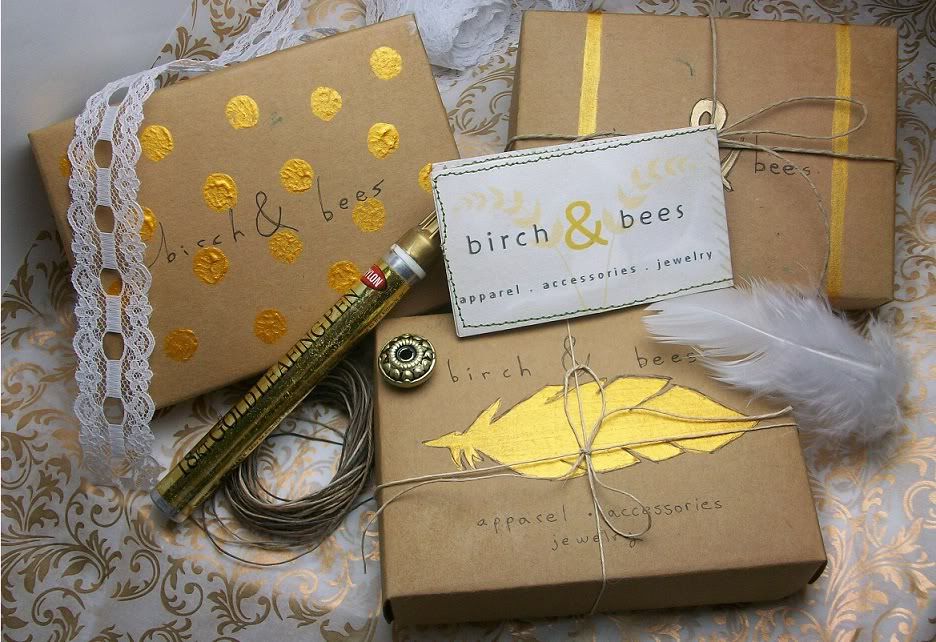
Be Frugal, But Splurge On Important Things. I try to keep my packaging costs down, as I would rather put more emphasis in the quality of the product. To save money, try making your own tissue paper wrap or confetti. Or make a stencil of your logo, to paint onto your bags and boxes. You could also make your own bags and boxes, or attempt to buy them wholesale for a discount. If you can keep the general packaging and marketing costs down, then you have more room to spend money on things you can't produce yourself. But, don't be afraid to invest in a material that can make a world of difference to the presentation of your goods.

Be Crafty & Creative. Don't let the ways you've seen business cards be made before influence how your cards are made now. Try using simple cardboard panels to cut out your own business cards. Add colored papers, textures, shapes, colors, and extra embellishments. Play and experiment with different designs. Don't be afraid to "break the mold" and do something really different! That's how unique brands get discovered.


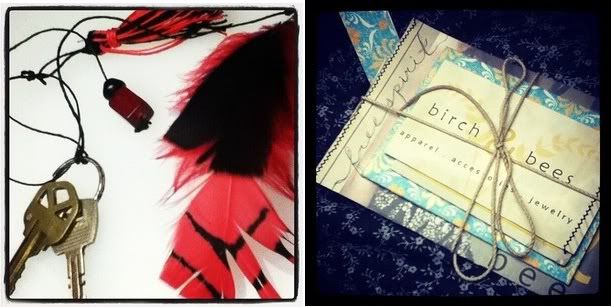
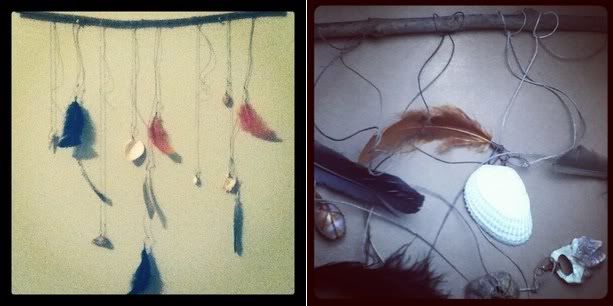
(Feather tassle keychains I give away with orders for my shop, A pretty package being sent off)


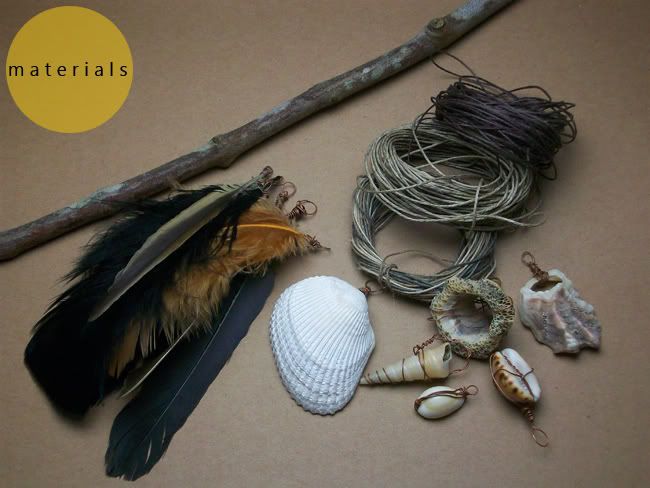
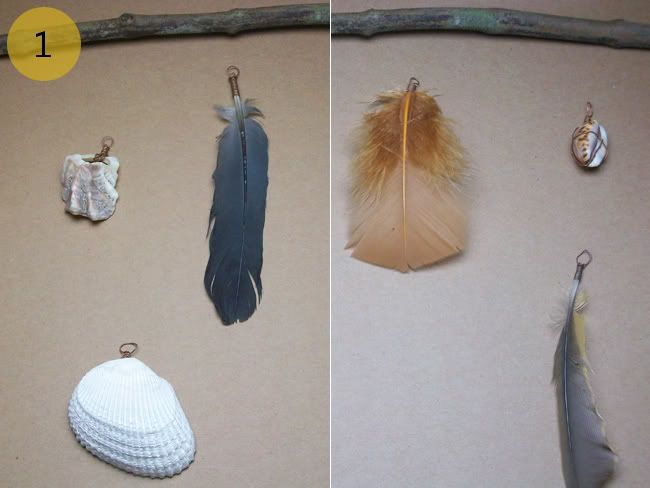
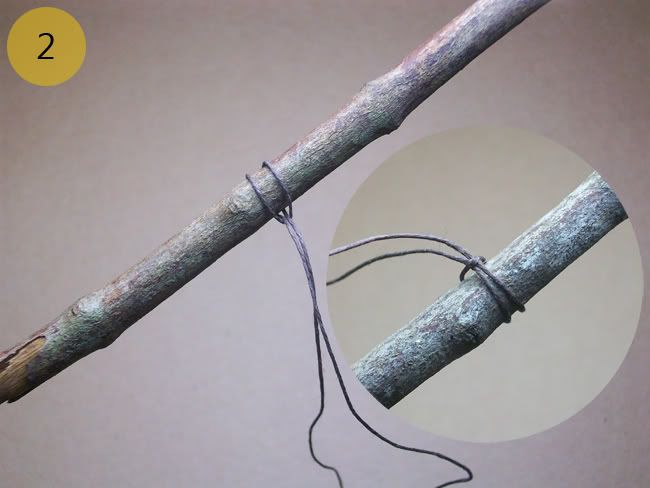
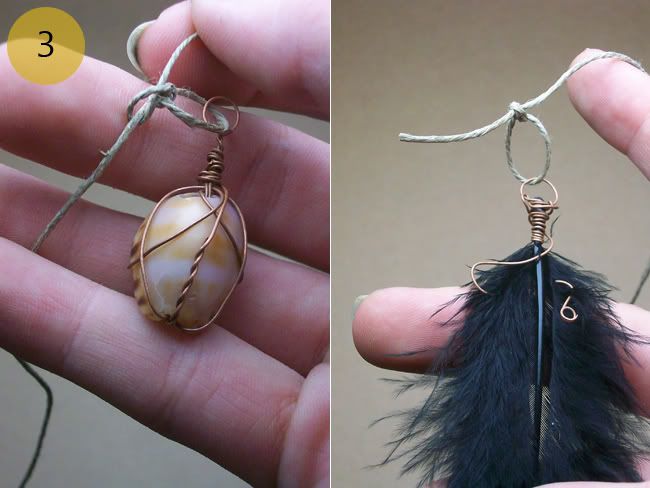
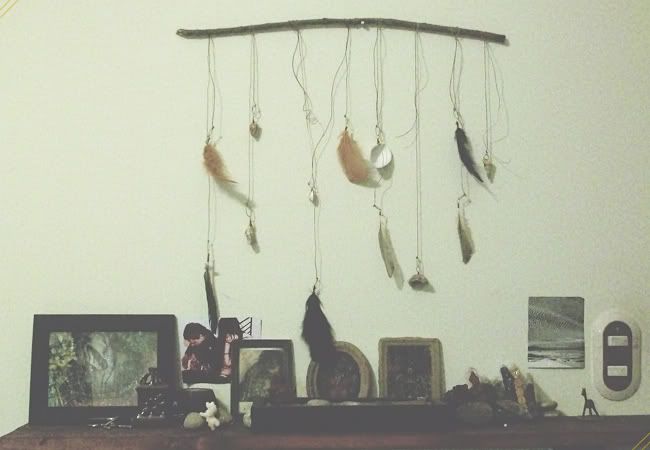
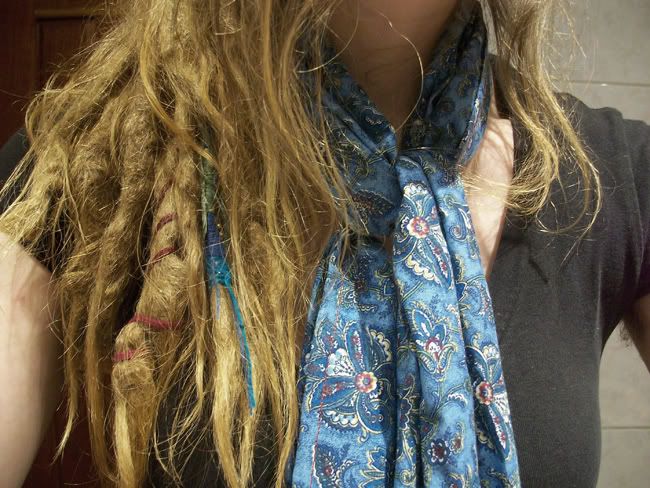
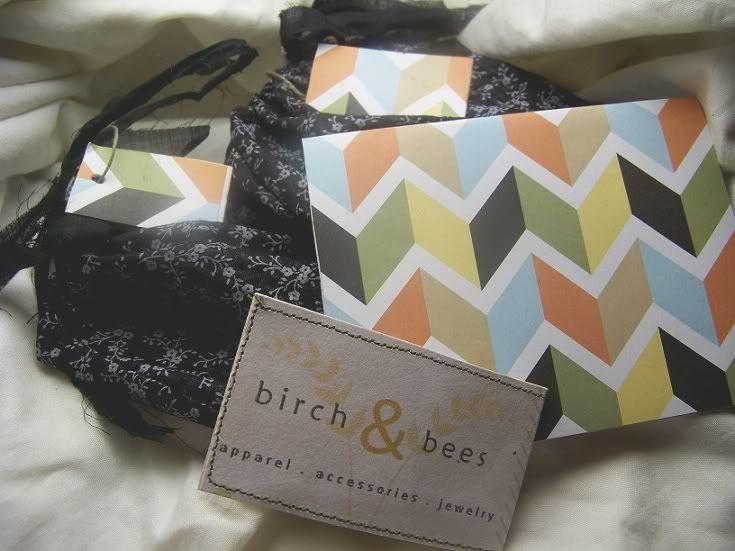
Incorporate Your Brand In Interesting Ways. As someone who sews handmade clothing, and makes a lot of feather jewelry, I use these two aspects a lot in my branding. I typically sew stitches, fabric swatches, or lacy bits to my business cards. I also include pretty feathers spread throughout the package. Look at your business and see how you can bring the aesthetic of your creations into your marketing. Crochet? Attach some small crocheted pieces to the cards. Paper Art? Make colorful, textured paper cards in a mixed media style. Try picking out 2 or 3 materials that you use frequently and see if you can incorporate them into your packaging in a creative way.

Put Effort Into It. The best packaging and marketing materials are ones that artists put effort into. As irrelevant as the packaging may seem to the seller, it makes a huge difference for the buyer. If you put a lot of effort into a package, the recipient will most likely notice. I don't recommend developing marketing materials/packaging and never update them again afterwards. At least once a year you may want to re-examine your strategy and see if any improvements can be made.


(One of my first packages from 2011)


Consistency Doesn't Have To Matter. I like to approach the packaging process as gift-wrapping. Each one can be unique and different, but always held together under the theme of my brand. Each customer to purchases an item from me will always receive the unique, special packaging. Their package won't look like any other I've made before.

Personally, I feel that it's a smart idea to "DIY" my marketing and packaging materials. I think it adds a more personal feeling to my business. It shows that I am invested in my products, my business, and my customers. It also gives me a feeling of authenticity as a handmade seller and artist, which is incredibly important to me.

(I do think that if you are finding your art/craft to be in high demand, then it may be worth it to buy more marketing and packaging supplies. Simply in order to save time for making, creating, and shipping out all the orders you are receiving!)


Well, I hope these little tips and bits of advice can help you make amazing packages and promotional materials. If you have made lovely packages, I would love to see them!

peace & love,
kaylee

3.25.2012

DIY Week: Braided Watch Bracelet

(In honor of International Earth Day & The Vernal Equinox on March 20th, I'm hosting a DIY Week on my blog. You can anticipate the normal programmed blog schedule, but from the 19th to the 25th of March 2012, I'll be sharing one new DIY tutorial each day. All of these projects are inspired by the re-purposing and re-cycling materials for the benefits of the Earth and preventing more things from ending up in the garbage. Click here to see more DIY tutorials by Kaylee.)


Welcome to Day Seven of DIY Week! This is a project I've been wanting to do for years. I picked up this little watch piece at a a thrift store years ago, wanted to make a bracelet piece for it. Originally, I wanted to do a Hemp bracelet attachment, but as I was searching my scrap bins, I found a piece of this beautiful fabric and inspiration struck! I'm so pleased to share this project with you, and I hope you enjoy!


Scissors.

Pliers.

A Watch Piece. As I mentioned above, I got mine at a thrift store years and years ago. I really loved the Roman Numerals and Brass color with Filigree edges. The batteries are dead and I've never been able to replace them. (It is forever stopped at 3:35 and 56 seconds.)

Jump Rings. (Not completely neccessary.) I used them because the bars where the chain/bracelet attaches is too small for me to pass the fabric through. You may not need to use jump rings.

Fabrics. I'm using a sheer fabric with yellow embroidered rectangles. (I adore this fabric so much, it's ridiculous.) I decided to use just one type of fabric for this project. But you can use a huge variety of fabrics, or make an alternating pattern instead, if you like.


I cut three 20" strips from this fabric. Then, I folded those three strips in half and cut them right down the middle. This left me with six 10" strips, which was more than enough for this project.

Don't worry about cutting them perfectly straight, you won't notice their irregularities after they have been braided together.


Take the watch piece and attach the jump rings (if you need them.)


Simply tie the strips onto the jump rings, or onto the watch piece itself (3). Three strips of fabric for each side of the watch. Make sure to tie the knots as tight as possible, but don't rip the fabric.


Lay the bracelet out flat, and begin to braid each side.

(*If you don't know how to braid, do a simple search on the internet for " How To 3 String Braid". You can find videos, pictures, examples, and numerous tutorials for simple to advanced braids and plaiting.)


I wanted my braid loose and ruffled so I don't pull the strips too tightly while braiding. Try to keep the braid side consistent on both sides. Put it on your wrist occasionally to see how much you need to braid. Once it's long enough, Tie a knot at the end of the braid. But be careful not to mess up the pretty pattern.


Be sure to leave two long strips at the end for tying the bracelet around your wrist. You can snip off the excess around the watch face and the ends. I prefer to leave mine ruffled and long.

You can also trim the stray threads if you desire.


And it's complete! I really love how my bracelet turned out. It's so perfect! I'm so happy to have found a use for this watch piece that I've been keeping with me for years.

If you have any questions about this tutorial, I'm more than happy to help you out! Just comment here, message me on facebook, or shoot me an e-mail. If you make your own Braided Watch Bracelet, please share some photos with me! 

Have a lovely & crafty day!


peace & love,
kaylee


3.24.2012

Outdoor Photo-Shoot (B&W)


A few days ago Daniel and I came into possession of a new camera and some photo equipment! I've been practicing my photography for years, but this past year I've grown and learned a lot. I'm excited to have this new equipment, so I can improve my skills even further.

Before we shot this, we did a practice round of photographing some art and experimenting with low-lighting. (I even shot some photos of a couple of the new bags I've made for the shop!)

Normally, I never shoot photos in black and white. But I've suddenly fallen completely in love with the monochromatic style, and I want to play around with it more after taking these photos!

I hope you enjoyed the results of our first photo-shoot! I'm usually very critical of my photos, but I really love these photos!

peace & love,
kaylee

DIY Week: Stone Photo Display

(In honor of International Earth Day & The Vernal Equinox on March 20th, I'm hosting a DIY Week on my blog. You can anticipate the normal programmed blog schedule, but from the 19th to the 25th of March 2012, I'll be sharing one new DIY tutorial each day. All of these projects are inspired by the re-purposing and re-cycling materials for the benefits of the Earth and preventing more things from ending up in the garbage. Click here to see more DIY tutorials by Kaylee.)

Today is Day Six of DIY Week, and I have another simple project to share with you! I adore this project because you can use any kind of materials you have. Any rocks, any wires, any photos. It's incredibly versatile, and you probably already have some of these materials lying around! Enjoy!


Pliers. For shaping the wire and cutting.

A Stone. I used a pretty river rock. You could use any rock, but it should be somewhat heavy.

A Photo or Drawing. I used a little polaroid collage artwork that my friend created a few years ago. It's on a thicker cardstock, so it stands upright in the photo display.

Wire. I used Steel. You could use Brass or Copper in a thick gauge.


First, bend the wire around the stone (1). Try to make the wire adjust to all the curves of the rock. Make sure to leave a bit of wire sticking straight up.


The wire should create a loop around the rock. Twist the longer wire around the short wire that is sticking straight up. (2)


Continue wrapping the wire around the back of the rock to create another loop in the opposite direction of the first. It should look like an X on the bottom (3).


Feed the free end of the wire under the loop (4a). Pull it tightly until it's secure and snug. (4b) This is very similar to wrapping a present with string or ribbon.


With the excess wire, begin to coil it around the piece of wire that is left sticking out the top (5a).

Finish it off with a small coil on the top to hold the photo/drawing (5b).


Pull the coil apart a bit so that your photo will fit inside comfortably and not be pinched too tightly or too softly.

If the stand is a little lop-sided, use your pliers to make the wire stick straight up.


And it's finished! The best part about this project is that you can do anything you like. The wire-wrapping doesn't have to be just like mine. You can just follow your gut and wrap it around the stone a bunch of times until it's snug and tightly secured.

I can't wait to get some photos printed and arrange them in a bunch of these wire-wrapped stones. They would look great in varying heights, different shapes and colors of rocks and metals. You could also replace the photo with an array of pretty feathers! There are a ton of possibilities!

If you have any questions about this tutorial, I'm more than happy to help you out! Just comment here, message me on facebook, or shoot me an e-mail. If you make your own Wire-Wrapped Stone Photo Display, please share some photos with me! 

peace & love,
kaylee

3.23.2012

DIY Week: Feather & Shell Wall Hanging

(In honor of International Earth Day & The Vernal Equinox on March 20th, I'm hosting a DIY Week on my blog. You can anticipate the normal programmed blog schedule, but from the 19th to the 25th of March 2012, I'll be sharing one new DIY tutorial each day. All of these projects are inspired by the re-purposing and re-cycling materials for the benefits of the Earth and preventing more things from ending up in the garbage. Click here to see more DIY tutorials by Kaylee.)


Welcome to Day Five of DIY Week, and I'm happy to bring you this easy project. It took me less than half an hour to make and I love the way it turned out! This wall hanging uses many found objects to make a simple piece of sculptural wall art. Mine is now hanging right above me while I sleep, it brings me so much happiness! I hope you enjoy this simple project!


A Branch/Twig/Stick. Make sure it's strong enough and big enough for the wall space you want to fill. (Also, if you live somewhere wet/humid, I would let the stick air out before crafting with it.)

Decorations. I decided to use feathers and shells that I've found. You can use whatever materials you like! Tassels, lace, anything you like. (My pieces are wire-wrapped, but you can do this project without the wire-wrapping.)

Strings. I'm using Hemp Threads in Natural, Brown, and Multi-Colored Shades.

Scissors.


Lay everything out and play with the alignment. I moved my decorations around almost a dozen times before settling on something.


Tie a simple knot onto the stick. If you're familiar with Macrame techniques, the knot I'm using is a "Lark's Head". I used this knot because it's super simple to un-do and re-attach.

You can use a more permanent knot if you like.


Tie on all of your dangling objects. Try to vary the length and arrangment of the objects to create more visual interest. Hang the stick on a nail in the wall and you're done!


I've been looking forward to making this project for a long time. It's even one of the Projects in my 18 Projects Book! (But I'm making another one for the 18 Projects series soon.)
I eventually decided to hang it above my bed, so I can admire it all the time. I'm so happy to see my beautiful shells and feathers serving a better purpose than sitting in boxes in my studio.

If you have any questions or comments about this tutorial, feel free to comment here, message me on facebook, or shoot me an e-mail. If you make your own Feather Wall Hanging, please share some photos with me!

peace & love,
kaylee

3.22.2012

Inspired: Hands


"Where the spirit does not work with the hand there is no art." 
-Leonardo da Vinci 

peace & love,
kaylee

DIY Week: Simple Scrap Scarf

(In honor of International Earth Day & The Vernal Equinox on March 20th, I'm hosting a DIY Week on my blog. You can anticipate the normal programmed blog schedule, but from the 19th to the 25th of March 2012, I'll be sharing one new DIY tutorial each day. All of these projects are inspired by the re-purposing and re-cycling materials for the benefits of the Earth and preventing more things from ending up in the garbage. Click here to see more DIY tutorials by Kaylee.)


Welcome to Day Four of DIY Week! I'm back with another simple DIY project to share with you! This project is another sewing-based project, but it could easily be hand-sewn. The pretty blue fabric was one that I was using to make a dress which I botched. (Fail.) So I made the dress into a bag. (Success.) And realized I still had a long piece of the fabric leftover. Luckily, inspiration struck and I decided to make a new scarf! I hope you enjoy this project!


-Scissors.

-Pins.

-Sewing Machine/Thread & Needle. This project is really quick to do with a sewing machine, but it can also be done by hand-sewing.

-Fabric Scraps. I'm using a long rectangle and two squarish pieces. These are some scraps I've had leftover from other sewing projects. Unlike the fabric scraps in my Boho Bunting DIY, these pieces are bigger.
You can use whatever scraps you having laying around, by trimming them all to fit together before sewing.


First, lay the squares/rectangles all together in a line. Match up all the seams (1).

My black pieces of fabric are wider than my rectangle. When I pinned my black fabric, I added a few pleats to make them the same width (1b). You can do this as well, or just trim the fabric pieces to be the same width.


If you decided to include pleats, then I would sew those first. Take the pieces of fabric that need to be pleated, and sew them individually (2).

(If you don't need/want pleats, continue to Step 3.)


Line up the edges of the fabric again, they should match up perfectly (3). Keeping a 1/4" allowance on both pieces of fabric, put pins into the seam. (The image below shows what the scarf should look like on the inside and outside.)

Once you have the seams pinned, then sew them together!


And it's finished! Now you can sew on lace, do some screen-printing, or style your new scarf. You could also fold the scarf inside out, sew it along the width, and turn it right side out. This will create a "Tube Scarf"!
This is an incredibly simple and versatile project. There are so many different things you can do with it!


If you have any questions or comments about this tutorial, feel free to comment here, message me on facebook, or shoot me an e-mail. If you make your own Scrap Scarf, please share some photos with me!

peace & love,
kaylee