


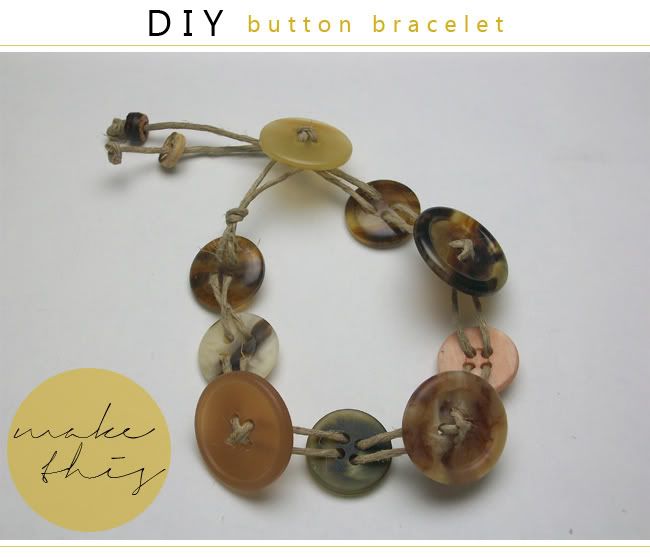
I've seen many people using the "Friendship Bracelet" techniques for making bracelets, belts, rugs, and many other things. I love seeing this classic pattern from my childhood being using in new and different ways. The nostalgic feelings began to remind me of the button bracelets that I made with my friends, when I was a child. I thought it would be fun to try it again and share the technique with others. It's really simple and fun, once you understand the pattern. Enjoy!
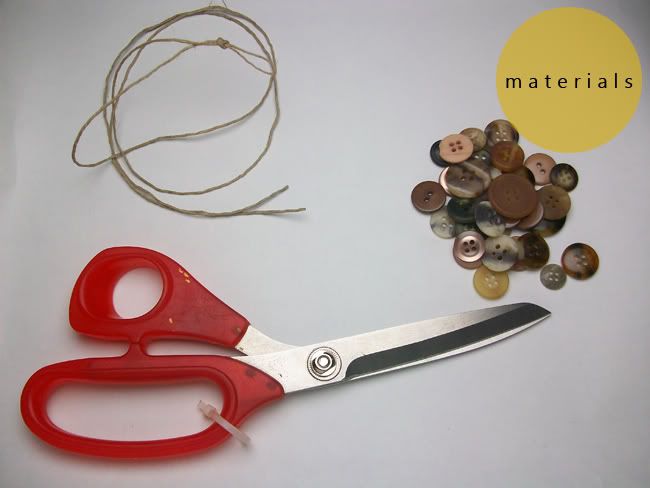
Scissors.
Thread/String. I'm using Hemp Thread. I would recommend using a thicker string than a thinner one. I'm not sure how the bracelet would turn out using really thin thread.
Buttons. Any color or sizes you like, but they should have four holes.
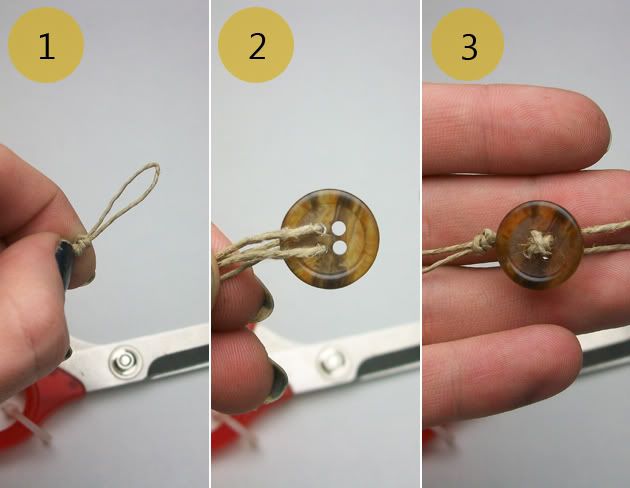
Cut a piece of string about two feet long. Fold it in half and tie a simple loop (1).
Feed the ends of the string through the first two button holes. Going in the back side of the button, and coming out the front side (2).
Then, feed the end of the strings through their respective opposite holes, and pull the strings tightly. Doing this should make a neat little "X" shape (3).
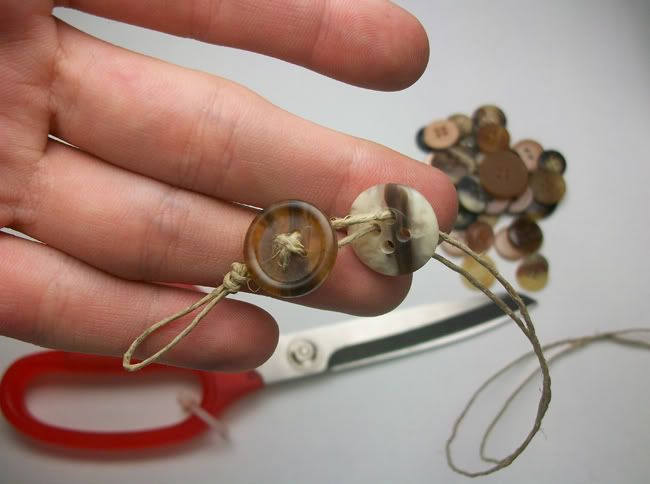
Repeat Steps 2 and 3 again. But this time, flip the button backwards. Continue this alternating pattern for the rest of the buttons.
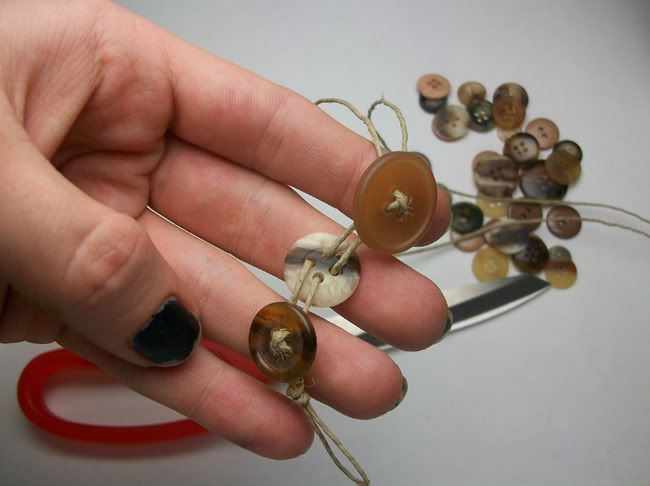
The "X" shape should appear on every other button, on each side. That's how you know you got it right.
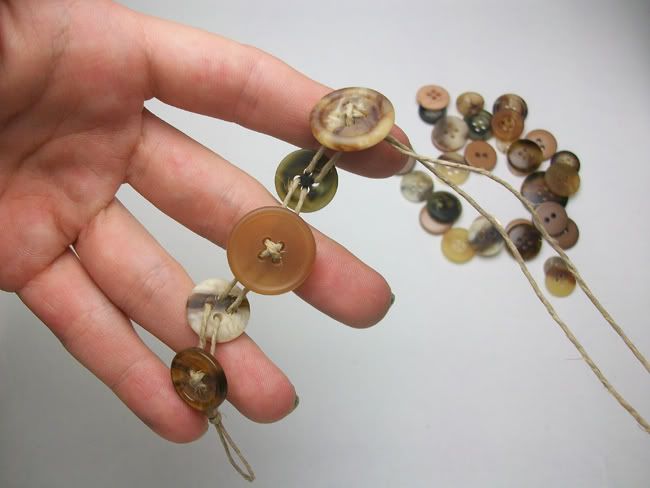
Eventually you should end up with a nice alternating pattern of buttons.

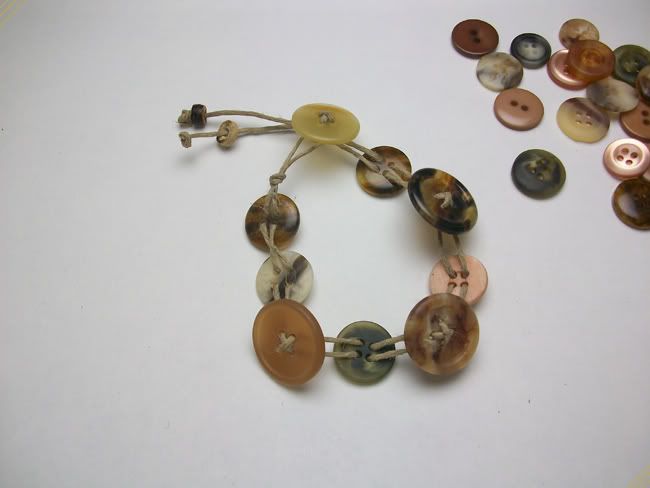
Once the bracelet is long enough, choose a large button to finish it off. Tie a couple tight knots behind the last button to secure the bracelet together.
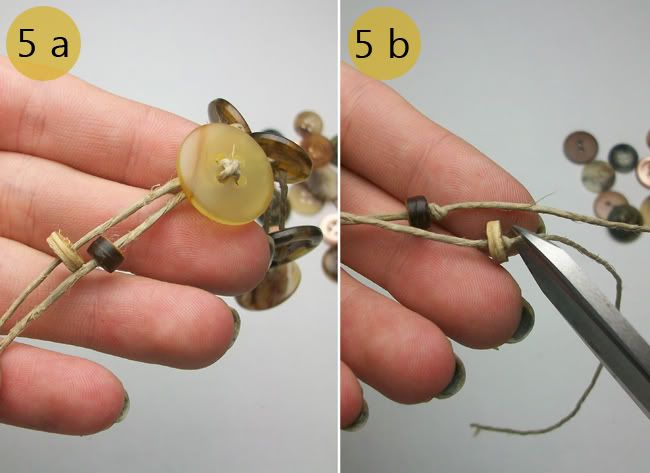
I decided to add some dangling beads onto my bracelet. To do this, just slip on some small beads (5a).
Decide how long you want the beads to dangle, tie a couple tight knots and snip off the excess (5b).
And it's done! These bracelets are really easy to make and can be made in all sorts of patterns. I remember these bracelets being a lot of fun to make, and I wasn't disappointed.
If you did this project, I'd love to see how it turned out. You can send comments & questions to: birchandbees (at) gmail.com! I hope you enjoyed this tutorial!
peace & love,
kaylee
This is absolutely adorable, and so simple, and I just so happen to have the extra buttons lying around to do it. Might have to make a run to the craft store for some hemp, but great job! Thanks for sharing!
ReplyDelete