


A couple months ago, I wrote "Watercolors, Inks, Buttons, Oh My!", a post about a mixed media artwork I made for Daniel's mother. I had so much fun making this project, I decided to write up a tutorial for this project. It can make a wonderful work of art for yourself, a gift for a friend, or just decor for your home.
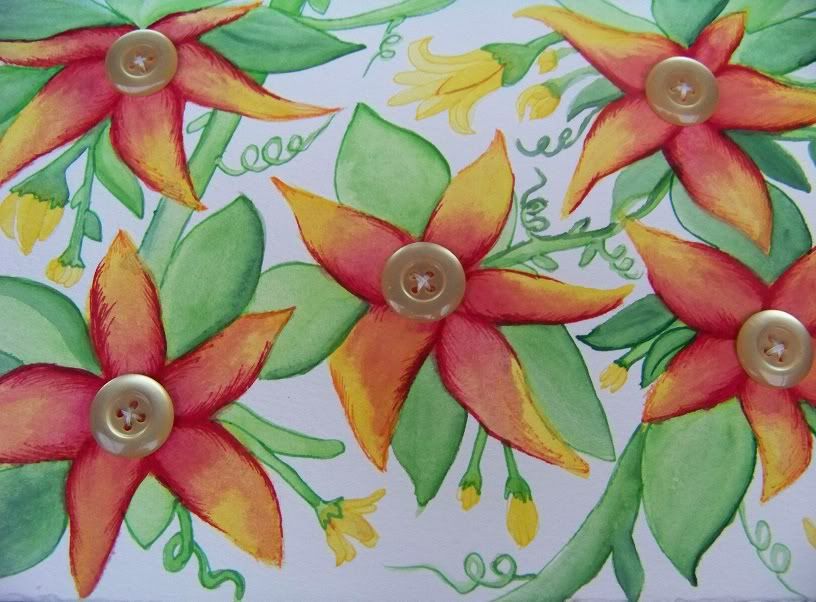
"Ana's Flowers" by Kaylee Hinrichs. March 2011. Watercolors, Inks, Pencils, Buttons.
In this tutorial, I use images of flowers and sew buttons into the center of each flower. Feel free to interpret this idea however you wish. It's only limited to your imagination.
Also, I used the technique of physically hand-sewing the buttons to the paper. You can use a sewing machine, some strong glue, or anything else you can think of.
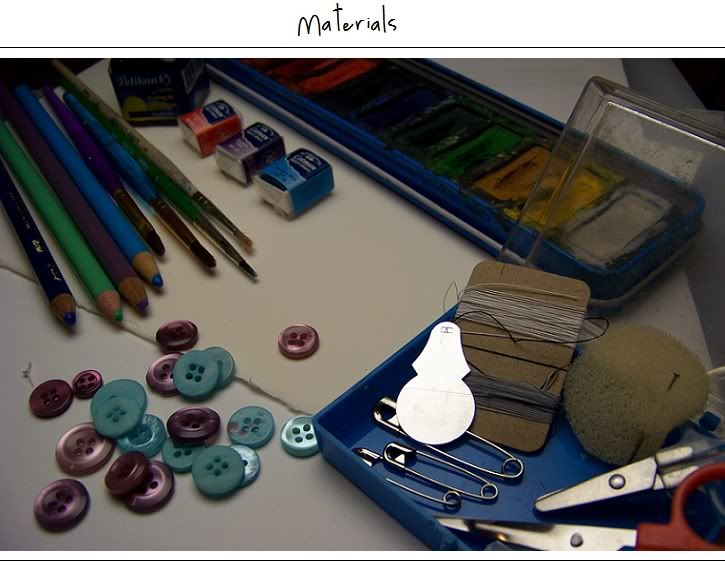
-Watercolor Paper/Card-stock/Thick Paper
-Sewing Thread, Embroidery Thread, Etc.
-Scissors
-Needle (Choose a strong needle, thick in diameter.)
-A Needle Threader (Extremely helpful, but optional.)
-Watercolors
-Inks (Optional, adds to the detail of a piece.)
-Colored Pencils / Watercolor pencil (Optional, adds to the detail of a piece.)
-Water Cup
-Paintbrush (Go for a pointer brush. One that tapers to a sharp point, like a pencil.)
Once you've assembled all of your materials, try to choose a specific color scheme to follow along. Having a color scheme in mind ahead of time can help greatly when making decisions about your artwork. I tend to choose 2 - 3 colors for a piece, but sometimes more.

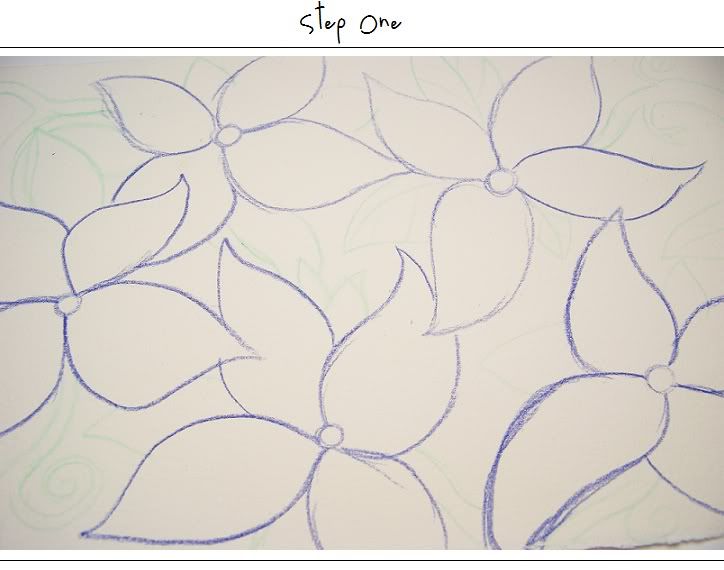
When you have a general idea of what colors you're using, choose the darkest color you want to use. Find a color pencil in that color and use it to begin drawing out the composition. For my painting, I draw the center circle of the flowers where the button will be, so I know how distant they will be from one and other. I begin drawing in the petals, making sure to jump around the drawing a lot. I wanted some of the flower petals to be on top of others, and some to be beneath.
Work the drawing very slowly and stop to look at the "big picture" frequently.
Tip: I try to do this step as simply as possible. I don't shade anything, or draw a lot of details. The biggest point is to just get the general image on the paper.
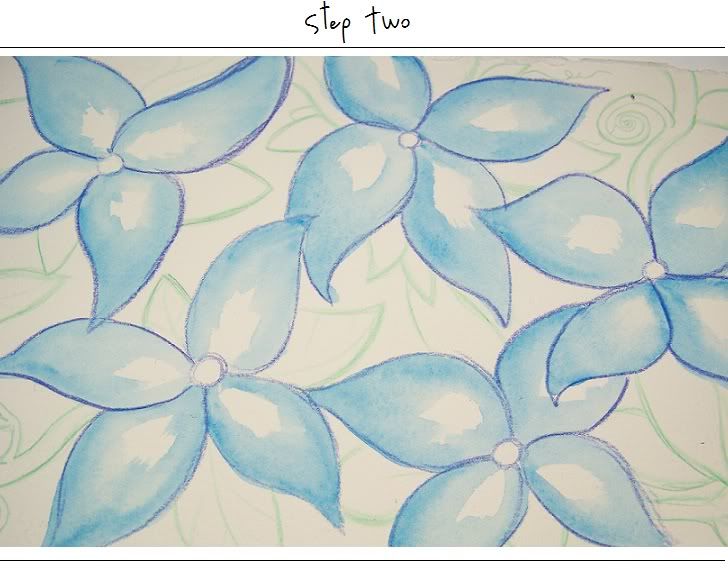
After putting down the drawing with the color pencil, I start the first round of painting. I work in sessions when I use watercolors. This is where I do a bit of painting, leave for 10-15 minutes, and then come back. This is just to allow the paper to dry completely before adding more water. (I leave the room just so I'm not tempted to mess with the painting until it's dry!)
For this first round, I simply fill in the flowers with the lightest color I want them to have. When working with layers of watercolors, I find it's best to go from light to dark. Removing pigment from watercolor paper is not easy and will most likely destroy the paper.
Once all the flowers have a shade of light color, I start to further define the vines, leaves, and flower buds. I use a couple green colored pencils to do this.

When going back into paint this time, I choose a shade slightly darker than the first color I used. I use this color to trim the outer edge of the flower petals to add more depth.
Once the petals have their second coat, it's very important to take a break. Although I didn't add that much pigment to the painting, the paper is wet. You'll want to make sure the petals are dry before painting anything else. After the work is dry again, paint the leaves and stems with the lightest shade of green.
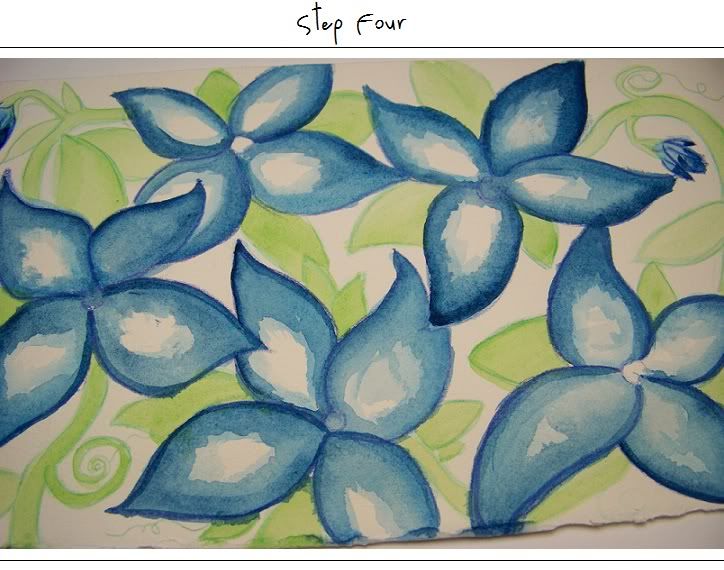
At this point, I crack open a bottle of blue drawing ink, and darken the edges of the flower petals. I chose to use blue because my drawing already has a lot going on already and I want to tone down the brightness.
Tip: Be sure to wait until the ink is completely absorbed into the paper before continuing or you may ruin your piece by smudging it.
On some petals, I may add more ink than others. I like to keep in mind that flowers usually don't all blossom at the same time. They often grow at different stages, different lifespans. So having little bits of uniqueness to each petal makes it feel more "real", I think.
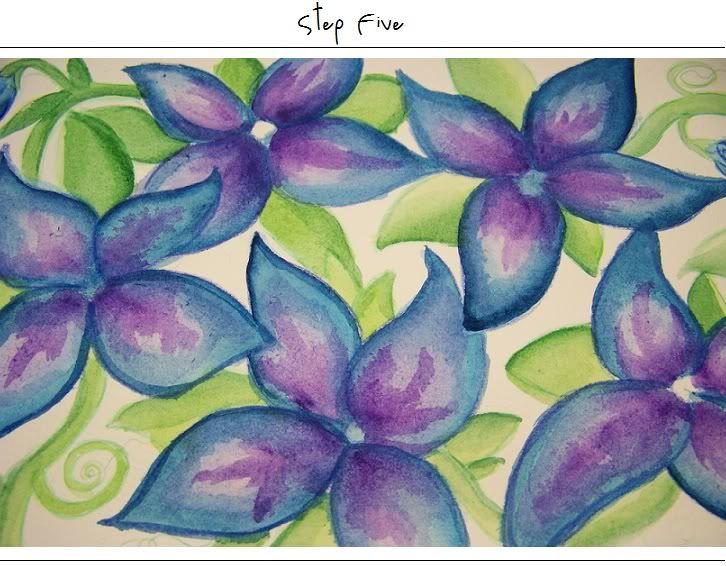
Now that the paper is nice and dry again, I go back in with some purple watercolors and add the pop color to center of each petal.
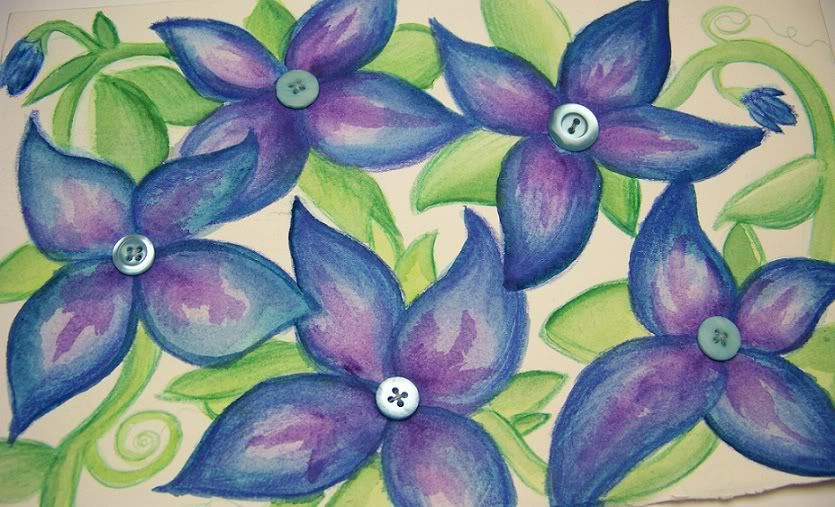
Picking up a few shades of colored pencils that correspond to my color scheme, I begin to further define the edges of the flowers and leaves. I use the pencils to create more depth and blend the light and dark colors together smoothly.

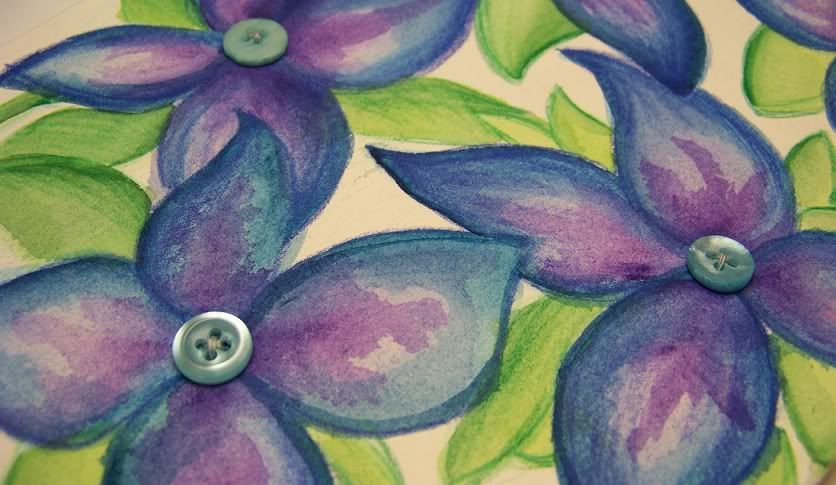
Now that all the painting and drawing work has been completed, it's time to sew the buttons! Which is my favorite part, but takes the longest amount of time.
Thread your needle (like I said earlier, Needle Threaders are amazing). Tie a few tight knots to secure the string to the needle. Then, tie many knots at the end of the piece of thread to keep it from slipping through the hole, which is made by the needle.
Sew the button onto the paper, as if you were sewing it to fabric. If you aren't sure how to hand-sew a button, click here to read a nice guide.
Repeat this sewing process until you've sewn all your buttons on.
Tip: Due to the large amount of patience needed to do this project, I only use about 5 or 6 buttons per project.
"May Flowers" by Kaylee Hinrichs. June 2011. Watercolors, Inks, Pencils, Buttons.
"May Flowers" by Kaylee Hinrichs. June 2011. Watercolors, Inks, Pencils, Buttons.
There are so many amazing things you can do with this simple idea. I love drawing and painting the flowers, simply because of how abstract they can be.
If you used this tutorial to make your own artwork, please tell me about it! Leave a comment, send me an email, & show me what you're working with! Also, if you really loved this tutorial, please feel free to share it. I hope you enjoyed it!
peace & love
kaylee
No comments:
Post a Comment