


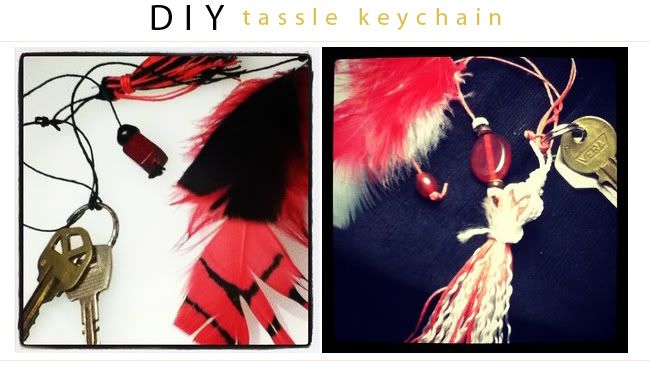
I am a huge fan of keychains. In fact, my collection of keychains is probably my largest and most expansive collection. You know when people travel to some place new and they take a magnet/mug/postcard/snowglobe/etc. with them? Well, I do that with keychains. I'll share more about my keychain obsession later. For now, here's how you can make your own keychain with a tassle!
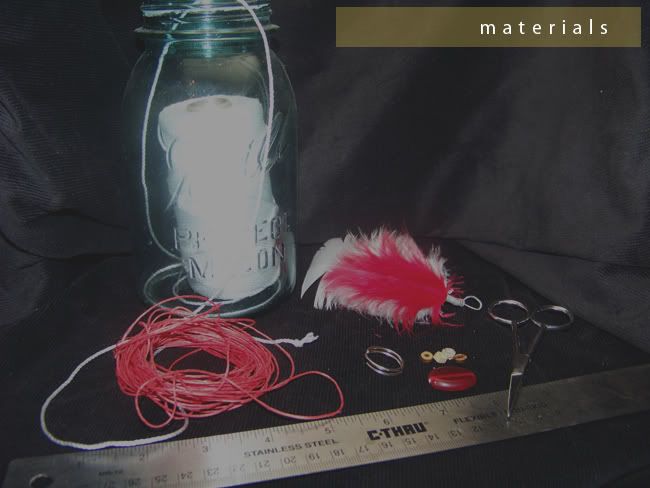
Materials
-White Cotton String
-Red Hemp Thread
-A grouping of feathers
-Wooden beads
-Large Glass Bead
-Keychain Hoop
-Scissors
-Ruler
(Of course, you can use whatever colors/embellishments which appeal to you the most.)
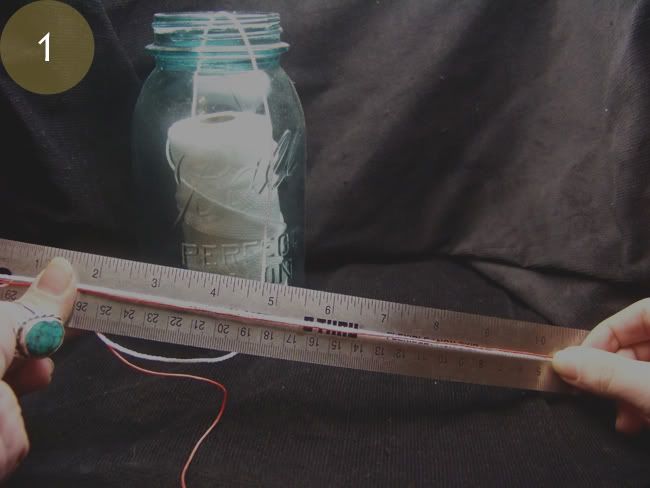
Lay the strings flat against the ruler to measure them. I'm using two different colors of strings, so I try to keep them as even as possible with each other.
When making tassles, it's important to remember that you want to cut the strings double the length that you want the finished tassle to be. (For example: I want 4 inch tassles, so I need to cut my strings at 8 inches each. 2 inch tassles = 4 inch strings. 7 inch tassles = 14 inch strings.)
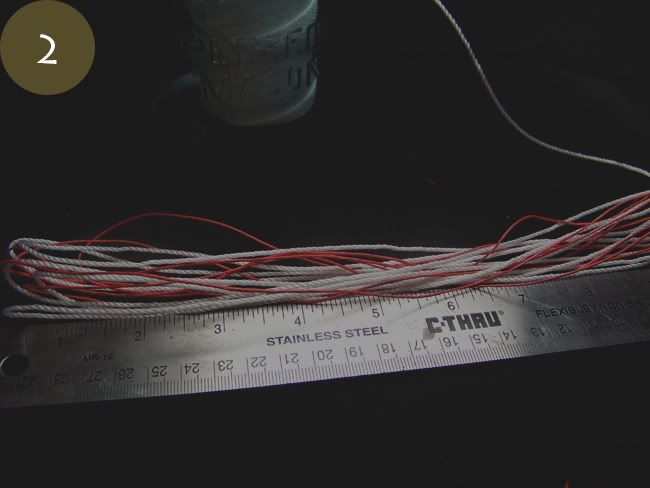
After measuring the first 8 inches, I take the strings off of the ruler, and begin wrapping them around my hands. (This is similar to bundling loose yarn/string/extension cord, if you've ever done that before.) When doing this, the lengths of the strings vary slightly, but they are generally consistent.
This is just a quicker technique which I've picked up from making a lot of tassles, you can always just cut the strings one length at a time. (But beware, this method is extremely time-consuming. You want to have a lot of strings in your tassle.)
(In the above photo, you can see how none of the strings are individually cut, just continuously wrapping over each other.)
Once you have enough strings to make a nice fat tassle, cut the strings and leave your bundle laying flat on a surface.
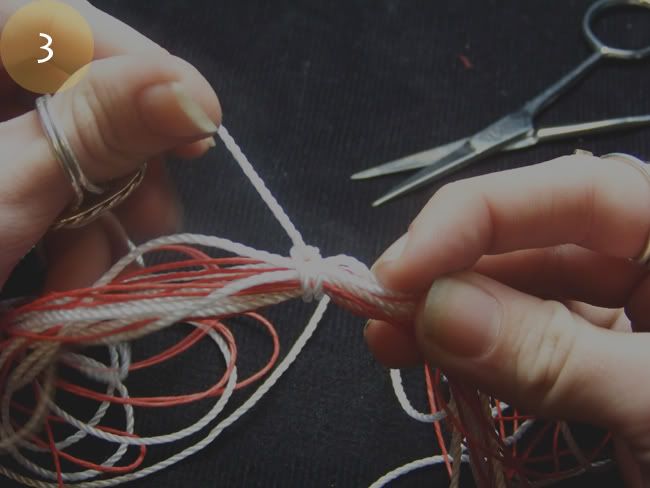
At this point, I find the center of the string bundle with a ruler, and tie a knot in the top. This secures the bundle in place while you continue to work.

From the knot I tied (in Step 3), I create a hoop, and make a knot at the bottom of the hoop. (4A. This hoop will be where you can hang the tassle from things.)
To keep everything situated together, I continue to tie knots around the base of the hoop. (4B) Once you can tug on the hoop without having it budge, then everything should be snugly fit together.
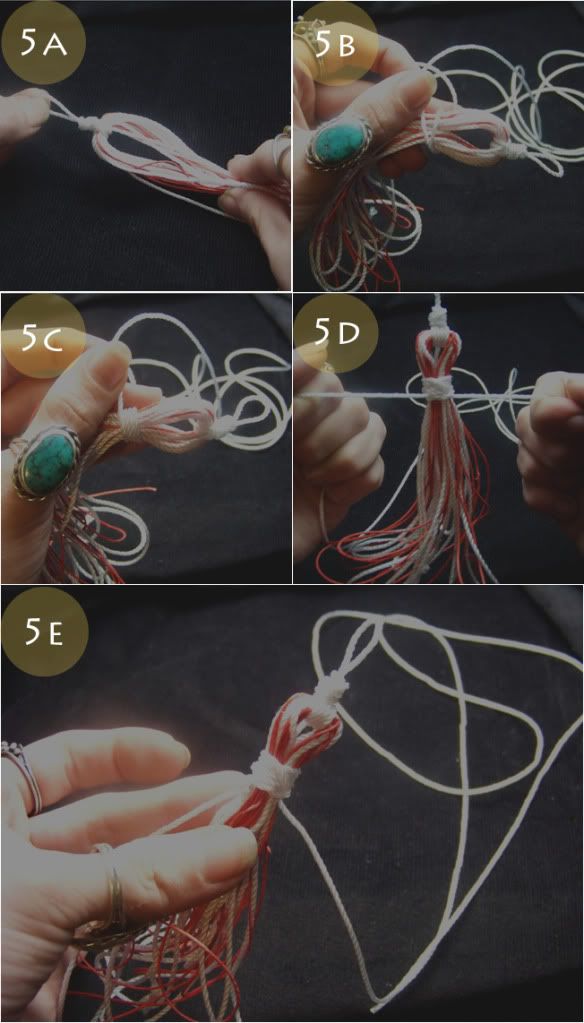
Hold the tassle gently by the hoop, and pull the strings down with your other hand. (5A)
While holding the tassle by the strings, begin to tie a knot. (5B. You can tie your knot higher or lower than mine. I've found that it's most effective to place it as close to the top of the tassle as possible. This creates more movement in the strings when it's completed.)
Wrap the string around the knot, over and over again. (5C) And knot it very, very tightly. (5D) This knot should be very secure, or else your tassle will fall apart!)
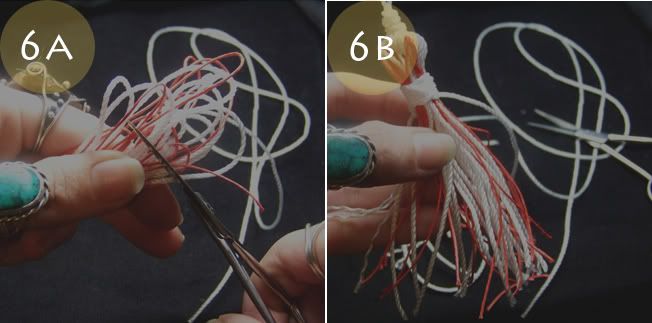
Measure/choose an appropriate length from your tassle strings. Some strings are stiffer, and need to be worn in before they behave as a typical tassle does.
My White Cotton string was starting to fray at the bottoms, I took advantage of this and purposely unraveled all the strings to make my tassle even fluffier.

Add on some small decorations, like feathers and beads. You could also use netted/trapped shells, rocks, fabric strips/tassles, and other things you like. There are a lot of different options of how you could decorate your keychain!
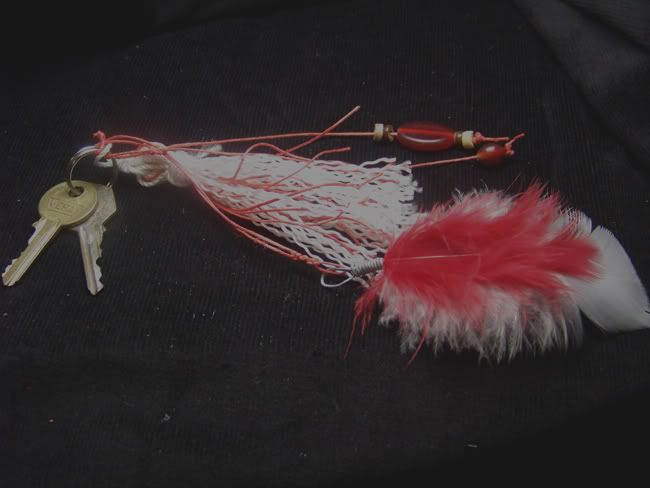
And this is the end result! I hope you enjoyed learning how to make a tassle keychain. I love making these keychains so much. I think I'm going to make more of them and give them away as freebies for my shop!
If you did this project, I'd love to see how it turned out. You can send photos, stories, comments, questions to: birchandbees (at) gmail.com!
peace & love,
kaylee
how fantastic! great share xo
ReplyDeleteC